Introduction
Ivanti’s Velocity tool allows legacy Terminal Emulator (TE) or Web applications to be wrapped in an easy-to-use mobile app. Velocity exposes a scripting API which can read the content of TE/Web page and to interact with the Android device. This API can be used to communicate with Six15’s app using the Intent Interface. This process allows any Velocity project to become HUD enabled. Velocity also allows most web-based clients like Manhattan Associates, Infor, SAP, Oracle, etc. to become HUD enabled.
The Velocity scripting API allows custom logic to be run on a per screen basis. Directly using the API in your project allows the most customization.
Six15 also has a “Smart Velocity” script which is designed to work reasonably well for any screen without the need for customization. This script can be used without needing to use the Velocity Console desktop application.
The Velocity Console desktop application can be used to create and customize Velocity projects. The project can then be deployed and run on an Android device using the Velocity app. When using “Smart Velocity”, the project can be generated automatically from the “Six15 ST1” app.
The Velocity App and Velocity Console are available for download on Ivanti’s Website . The Velocity app is also available on the Google Play Store.
You can learn more about the Velocity Scripting API and the Velocity Console on Ivanti’s Website.
Smart Velocity Process
Acquire an ST1 HMD (Contact info@six-15.com).
Install the Velocity app (Ivanti Website download or Google Play Store) and Six15 ST1 app (Six15 SDK Release or Google Play Store) on your Android device.
Go through the start-up process inside the “Six15 ST1” app.
Hit the “Add Smart Six15 to Velocity” button within the “Six15 ST1” app. (If Velocity was already running, you may need to close and re-open it.)
Inside the Velocity app, tap the menu next to the “Six15 Smart Velocity” profile, select “Edit”, enter the default password “system”.
Make any adjustments like setting your server IP and port.
Save your edits by hitting the back button and selecting “Yes”
Run the project by tapping on it’s name. The Six15 Intent Interface will automatically start, and will start showing images on the HMD.
Optionally, use the Smart Configurator within the Six15 ST1 app to adjust keyword priority and other settings.
Add Smart Velocity to Existing Velocity Project
To add Smart Integration to an existing Velocity project. you’ll need to add a Six15 designed script (six15_smart_velocity.js) to your Velocity project.
This is done using the Velocity Console (Ivanti Website download).
Acquire an ST1 HMD (Contact info@six-15.com).
Install the Velocity app (Ivanti Website download or Google Play Store) and Six15 ST1 app (Six15 SDK Release or Google Play Store) on your Android device.
Go through the start-up process inside the “Six15 ST1” app.
In the Velocity Console, open your existing Velocity Project.
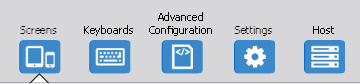
Click “Advanced Configuration”.
Under Tasks, select “Create Task”.
Give the task a “Display Name”. Something like “Six15 Smart Velocity”.
Give the task a “Function Name”. Something like “six15_smart_velocity”.
Give the task a “Default Scope” of “session”.
Fill out the description and the rest of the fields.
In the Script tab under “Create Task”, paste the contents of the file six15_smart_velocity.js.
Save your script using the blue “Save Task” button.
Link the script to the session scope. The scope name should be “session” (without a prefixed “@”).

Save your project using the “Save” button.
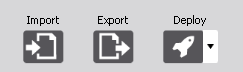
Re-export the updated .wldep file by clicking the “Deploy” button at the top.
Deploy the .wldep to your devices using your existing MDM solution.
Pick a location to save the .wldep file (i.e. your desktop) then click “Save”. You can also export your project to a ZIP file to back-up or share all your work.
Custom Velocity Process
Setting up a custom deployment is more complex, but offers greater customization.
1. Obtain the Required Hardware and Software
To successfully HUD enable a project, you will need the following:
- Hardware:
PC running Windows 10 or higher.
An Android device running Android 6.0 (Marshmallow) or later with a USB-C port.
A USB cable to connect your Android device to your PC.
An ST1 HMD (Contact info@six-15.com).
Physical ST1 hardware is only needed to test and validate your integration. It isn’t strictly necessarily for any of these steps. A wireless file transfer method between the PC and Android device could replace the USB cable.
- Software:
Velocity Console (Ivanti Website download).
Velocity Android application (Ivanti Website download or Google Play Store).
Six15 ST1 Android application (Six15 SDK Release or Google Play Store).
2. Verify your Configuration
It’s generally assumed Velocity is already in use, but if not follow the instructions on https://help.ivanti.com/wl/help/en_US/Velocity/2.1/admin/gettingStarted.htm.
Current Velocity users likely already have a host profile setup inside the Velocity app. This host profile can be used to record screens in the next step.
If you don’t have an existing host profile you will need to create one. You will need to know the IP address of your server, as well as related data, like port, protocol, login info, etc..
With this information in hand, there are multiple ways to create an initial project.
Create one inside the Velocity app using the “+” icon at the upper right, using the default password “system”.
Create a .wldep file using the Velocity Console and deploy it to your Android device.
Create a .wldep file using the “Rapid Modernization” tool https://rapid.ivanti.com/migrate, then deploy it to your Android device.
The project is not yet HUD enabled. It is only used to record screens in the next step.
3. Record Terminal Screens
Launch the Velocity application, and select your desired Host Profile (which likely has the same name as your project) to start a Velocity TE session. Make sure you have successfully connected to the server but do not yet navigate through your workflow.
Tap the menu icon (3 horizontal lines) in the bottom left.

Select “Screen Capture” to start recording your session.
Note
Although it defaults to enabled, some projects may have the “Screen Capture” option disabled. If this is the case you must enable the property in Velocity Console and re-deploy your project.
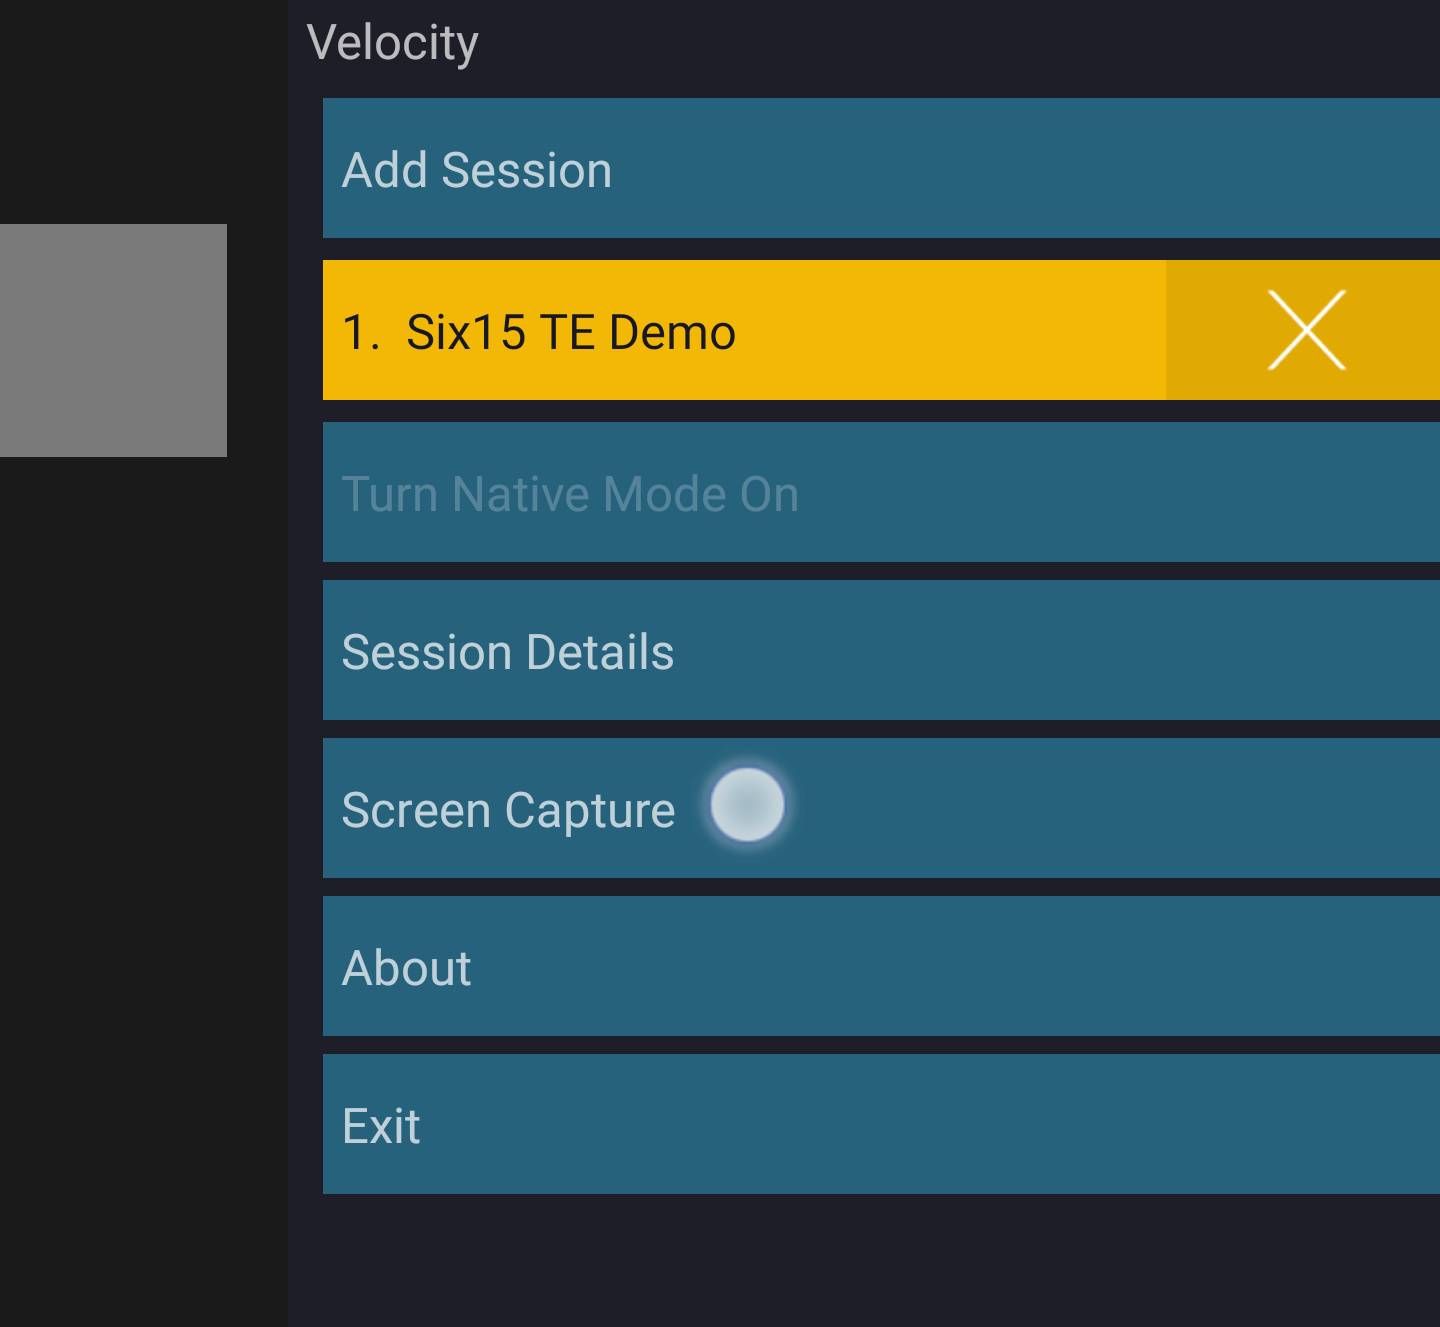
Once recording has started you’ll see a red recording icon.
While recording, perform the actions you would like to HUD enable. These should involve visiting every type of screen which should have a corresponding HUD screen. Make sure to purposefully trigger error screens and navigate through all relevant workflows.
End your recording by tapping the red recording icon, and select YES to save the recording.

Your recording is saved on the Android device inside the folder /sdcard/Android/data/com.wavelink.velocity/files/.
4. Copy Recording to your PC
The recording file on your Android device needs to be moved to your PC so it can be used by the Velocity Console.
To access this file, connect your Android device to a PC using a USB cable. You may need to enable file transfer by tapping on the charging notification, and switching “Use USB for” option to “File transfer”. Your device should be shown in your PC’s file explorer. Its name is normally the model name of your Android device.
In your file explorer, navigate to <android-device-name>/<device-internal-storage>/Android/data/com.wavelink.velocity/files/.
Inside this folder are all screen recordings (.wltsc files) and deployment files (.wldep).
The desired .wltsc file should be named your profile’s name, followed by a number. The highest number is the most recent recording. Alternatively, sort by modified date to find the newest file.
Move the desired .wltsc file from the Android device to the PC by copying (or drag-n-drop) it to some location on your PC (i.e. your desktop).
5. Import Screens into Velocity Console
Open the Velocity Console application on your PC.
If you don’t already have a Velocity project (since you created it on-device, or online, or if was created by someone else) you’ll need to create a new one.
Note
Some projects may already have had customizations made to them, like being previously Voice Enabled or HUD enabled. Projects may also have had their Modern UI’s customized, their predictive UI’s styled, or their scanner/keyboards setup customized.
If your deployment had this type of customization, you will need to use your existing project as a starting point instead of creating a new one from scratch.
When creating a project you’ll have to set you server IP address, and other configuration information. These values can be edited later on-device, but setting them here avoids needing to manually configure every deployed device.
With your project open, navigate the the screens tab by clicking the button in the top right.
On the screens tab, click the “Add Screens” button in the bottom left.

In the file selection dialog, select the .wltsc file from the previous step, and click “Open”. Velocity Console should now show a list of screens in the left panel.
6. Assign Templates to Screens
Velocity automatically analyzes your screens and finds important identifying regions. It separates the screens into groups based on these regions. Screens which have a similar format (but may have different data) will be grouped together. Velocity can associates a single “template” with each of these groups.
By default every group of screens is marked as “predictive”. This means no template based customizations exist for that for that group. To make a group of screens “templated” instead of “predictive”, simply edit any UI element in the “ModernScreen” UI by changing any element property. An easy way to do this is to select a text element and change it’s alignment from “center” to “left”, and then back to “center”.
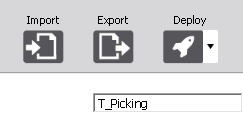
After making any tiny adjustment, every screen in that group will no longer be “predictive”, but will be “templated”. This means template based customizations can be made to the those screens. The first customization you should make is to assign the template a name. Use the the text box above the center panel (directly under the “Deploy” button) to set the name.
In the left hand panel, you should see every screen matching that template is now showing it’s corresponding template name.
Repeat this process for every screen which is still predictive and still lacking a template name. You may find that some screens are misidentified by Velocity causing too many or too few groups. This can be resolved by adding or removing identifying “key” regions. Doing this can split groups which no longer match, or merge groups which now do match. There may also be blank, partially broken, or incorrectly recorded screens. It’s best to ignore or delete these and not assign them templates.
7. Design a HUD Screen for each Template
Scripts running inside Velocity are also called Tasks. Steps to creating a script (task) are:
Click “Advanced Configuration”
Under Tasks, select “Create Task”
Create a task for each template created above that you want a HMD screen for.
In the Script tab under “Create Task”, paste your script. See Example Templates. Modify script to match specific data from each screen.
Each template can be linked to scripts which run when a screen matching that template is active. These scripts can be used to display information the HUD. See the section below and our Velocity TE examples on GitHub to learn more.
Once all your scripts are written and linked, your project can be deployed to a .wldep file. With your Velocity project open in the Velocity Console, click the “Deploy” button at the top.
Pick a location to save the .wldep file (i.e. your desktop) then click “Save”. You can also export your project to a ZIP file to back-up or share all your work.
8. Deploy the final project to an Android device
The .wldep file created in the previous step needs to be transferred to the Android device. Make sure you’re using the .wldep file from the previous step, and not the file used for recording screens.
Connect your Android device to a PC using a USB cable. You may need to enable file transfer by tapping on the charging notification on the Android device and switching “Use USB for” option to “File transfer”. Your device should be shown in your PC’s file explorer. Its name is normally the model name of your Android device.
In your file explorer, navigate to <device-internal-storage>/Android/data/com.wavelink.velocity/files/.
Inside this folder are all screen recordings (.wltsc files) and deployment files (.wldep).
Move the .wltsc file from your PC onto the Android device by copying (or drag-n-dropping) the file into this folder.
You should see your project under the list of “Host Profiles” (you may need to restart the Velocity app).
If you didn’t set them in the Velocity Console, you may need to modify your server’s IP address or other configuration settings. This can be done by tapping the “…” menu to the right of the profile name. Select “Edit”, and then enter the default password “system”. From here you can make any adjustments needed.
9. Test and Validate the Deployment
If you haven’t already, install and run the Six15 ST1 app. Go through the on-screen setup, including permissions, first time plug-in, and first time setup.
Back in the Velocity app, start your project by tapping on it’s name under the host profiles list.
Assuming you followed the recommended integration process, the Six15 Intent Interface will start automatically. When you navigate to a screen matching a template with an associated script, that script will run, extract the proscribed information from the TE screen, and display it on the ST1’s display.
Navigate through every screen, and make sure all HUD screens are shown as expected. If anything is wrong, make adjustments in Velocity Console, and redeploy the wldep file.
Writing Velocity Scripts for the HUD
Velocity’s JavaScript based scripting environment exposes their Velocity API to user defined scripts. The Velocity API exposes 3 API endpoints needed to HUD enable a Velocity project.
Action.launch()to start the Intent Interface.Action.sendBroadcast()to send messages to the Intent Interface.ModernScreen.getTextById()to read template defined values from the terminal screen.
Note
The velocity scripting engine will stop running all scripts if there is a syntax error, fault or exception in the code.
HUD enabling a Velocity TE project requires 4 main development steps:
These steps can be followed here, but alternatively, check out our Velocity TE example project on GitHub https://github.com/Six15-Technologies/Velocity-TE-Example.
1. Create a script to launch the Intent Interface
The following code starts the Intent Interface using Velocity’s Action.launch() API.
Action.launch({
    package: "com.six15.st1_connect",
    class: "com.six15.intent_interface.IntentInterfaceActivity"
});
This script needs to be linked to a scope in order to run. It’s often OK to link this starting script with the “session” scope(no “@” prefix needed) so it runs as soon as the connection to the server starts.
There is a possibility of a race condition between starting the Intent Interface and the receiving the first piece of broadcasted text. By including the first screens information alongside “Action.launch” instead of a later “Action.sendBroadcast”, it ensures that the first piece of content is always shown reliably. In most cases this isn’t necessary.
The initial values could also be used to show an initial “Welcome” screen.
Action.launch({
    package: "com.six15.st1_connect",
    class: "com.six15.intent_interface.IntentInterfaceActivity",
    action: "com.six15.hudservice.ACTION_SEND_TEXT",
    extras: [
        { name: "text0", value: "Hello from Velocity", type: "string" },
        { name: "bg_color0", value: "BLUE", type: "string" },
    ]
});
If an initial screen is used, and that screen’s content is dynamically read from the TE, then the “session” scope can’t be used for linking. Instead, the scope for the screen containing that dynamic content must be used.
2. Creating HUD Screens Using Velocity Scripts
The following Velocity Script sends an image the the HUD using the Action.sendBroadcast() API.
The dynamically determined values (aisle, shelf, and level) are read from the terminal with “ModernScreen.getTextById()”
function sendTextToHud(event) {
// Read the string value of the id
var hud_aisle_str = ModernScreen.getTextById(aisle_id);
var hud_shelf_str = ModernScreen.getTextById(shelf_id);
var hud_level_str = ModernScreen.getTextById(level_id);
// getTextById() often returns strings with trailing spaces. The Velocity UI removes them automatically, so we do too.
if (hud_aisle_str == null || hud_shelf_str == null || hud_level_str == null) {
return; // This stops occasional empty screens from rendering.
} else {
hud_aisle_str = hud_aisle_str.trim();
hud_shelf_str = hud_shelf_str.trim();
hud_level_str = hud_level_str.trim();
}
// Send a broadcast to the HUD.
Action.sendBroadcast({
action: "com.six15.hudservice.ACTION_SEND_TEXT",
flags: ["ReceiverForeground"],
extras: [
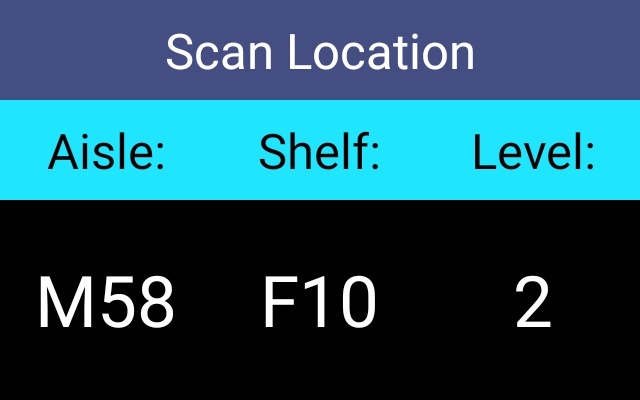
{ name: "text0", value: "Scan Location", type: "string" },
{ name: "bg_color0", value: "#454e83", type: "string" },
{ name: "weight0", value: "1", type: "string" },
{ name: "text1", value: ["Aisle:", "Shelf:", "Level:"], type: "string" },
{ name: "bg_color1", value: "#20e5ff", type: "string" },
{ name: "color1", value: "BLACK", type: "string" },
{ name: "weight1", value: "1", type: "string" },
{ name: "text2", value: [hud_aisle_str, hud_shelf_str, hud_level_str], type: "string" },
{ name: "weight2", value: "2", type: "string" },
]
});
}
sendTextToHud();
WLEvent.on("ScreenUpdated", sendTextToHud);
See the full section on the ACTION_SEND_TEXT to fully understand the data being broadcast.
Note
The inclusion of flag ReceiverForeground forces the Android OS to handle the broadcast with foreground priority using Intent.FLAG_RECEIVER_FOREGROUND
Skipping this flag will add significant latency to the system.
Note
ModernScreen.getTextById() can occasionally return null. Check for null before dereferencing to avoid a crash.
This image would be shown on the HUD.
Trimming strings read back from the Velocity API is recommended since they often have trailing spaces.
Adding a "ScreenUpdated" event which re-draws the HUD is recommended since the text fields may change without firing a new template enter event.
This is especially important when the screen content changes without switching templates.
The event is automatically removed when the associated template leaves scope so no cleanup is needed.
In this script, the various *_id variables are defined as parameters to the script. When defining a parameter, make sure the “String” box is checked. In this example other values like color, weight, etc… are hardcoded.
Using parameters vs hardcoded values is up to developer preference. In general we’ve found it’s better to reduce the number of parameters and reduce complexity, at the expense of having more scripts.
In addition to the straight forward logic here, more complex processing could be performed. For example, you might change the color of text to be red when a number is negative.
It’s also sometimes useful to run regular expressions on strings. For example, this line trims “_” or ” ” characters from the end of a string.
str_value = str_value.replace(/[_ ]+$/, ''); //Remove ending "_" or " " characters.
3. Linking Scripts to Template Scopes
Once written, a script needs to be linked to a template in order to tell it when to run. This will make the script run (i.e. show something on the HMD) whenever that template is active. This can be done using the “Link” button in the center of the “Advanced Configuration” tab.
The scope name should be the template name prefixed by an “@”. For example “@T_Work_Info”.
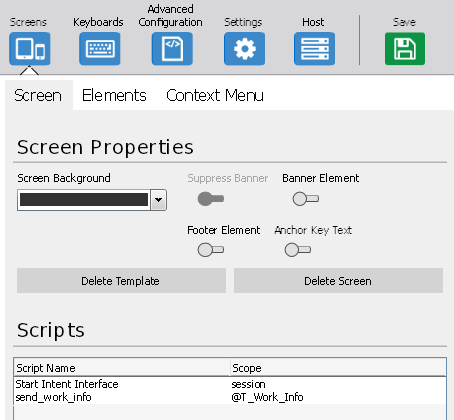
You can verify that a specific screen is properly linked by going back to the “Screens” tab, selecting the desired screen, selecting the “Screen” tab, and seeing the script name under the “Scripts” section.
4. Populating script parameters
Once linked, the script parameter must be defined for that linking. In the example above, the various *_id variables need to be set to “Component ID”s (like “added_637696438393953452” or “component-2”) that are located on the linked template. Other parameters could be set to other fixed values like “615”, “Scan Location”, “RED”, or “#ff0000”.
To determine the “Component ID”s of a specific UI component on a specific template, go to the “Screens” tab. Select the screen (make sure that screen’s template is the one you’re linking), then select the desired text box on that screen’s template. The “Component ID” is listed on the right under the “Elements” tab.
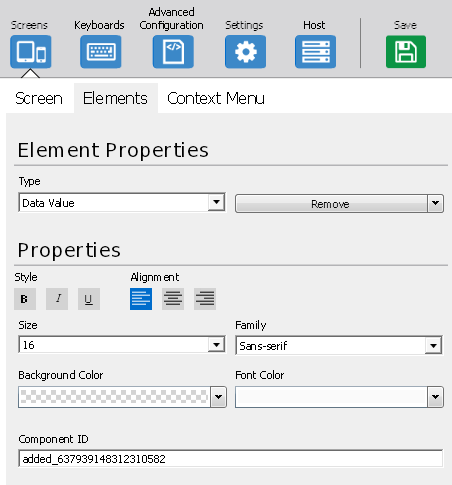
If there is no component matching the text you need, you can create a new one by selecting that region of the TE screen and clicking the arrow in the floating menu. Since the text could very in size, be sure to select the largest region the text could cover. This normally means selecting the entire width of the TE screen.
Back in the “Advanced Configuration” tab, set the parameter’s value to the desired “Component ID”.
Example Screen Templates
Here is a listing of common HMD screens used in velocity. These are given to help display
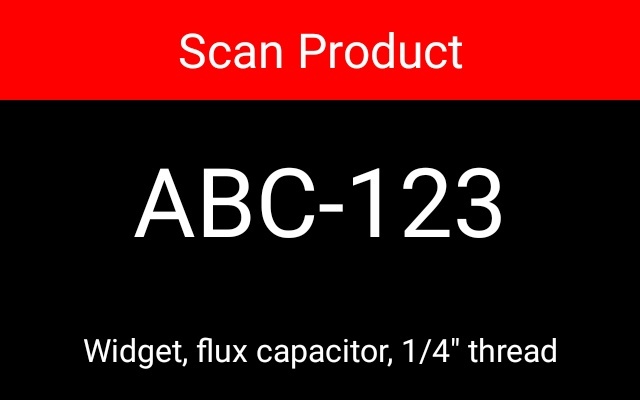
Basic Information (3 Line)
function sendTextToHud(event) {
// Read the string value of the id
// getTextById() often returns strings with trailing spaces. The Velocity UI removes them automatically, so we do too.
// var hud_pn_str = ModernScreen.getTextById(aisle_id);
// var hud_pn_str = ModernScreen.getTextById("added_637907317735267863");
// if (hud_pn_str == null) {
// return; // This stops occasional empty screens from rendering.
// } else {
// hud_pn_str = hud_pn_str.trim();
// }
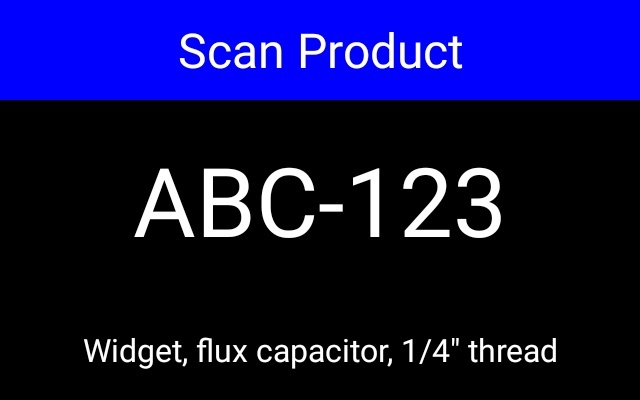
var hud_pn_str = "ABC-123";
var hud_desc_str = "Widget, flux capacitor, 1/4\" thread";
// Send a broadcast to the HUD.
Action.sendBroadcast({
action: "com.six15.hudservice.ACTION_SEND_TEXT",
flags: ["ReceiverForeground"],
extras: [
{ name: "text0", value: "Scan Product", type: "string" },
{ name: "bg_color0", value: "BLUE", type: "string" },
{ name: "weight0", value: "1", type: "string" },
{ name: "text1", value: hud_pn_str, type: "string" },
{ name: "weight1", value: "2", type: "string" },
{ name: "text2", value: hud_desc_str, type: "string" },
{ name: "weight2", value: "1", type: "string" },
]
});
}
sendTextToHud();
WLEvent.on("ScreenUpdated", sendTextToHud);
Basic Error (3 Line)
function sendTextToHud(event) {

    // Read the string value of the id
    // getTextById() often returns strings with trailing spaces. The Velocity UI removes them automatically, so we do too.
    // var hud_pn_str = ModernScreen.getTextById(aisle_id);
    // var hud_pn_str = ModernScreen.getTextById("added_637907317735267863");
    // if (hud_pn_str == null) {
    //   return; // This stops occasional empty screens from rendering.
    // } else {
    //   hud_pn_str = hud_pn_str.trim();
    // }
    var hud_pn_str = "ABC-123";
    var hud_desc_str = "Widget, flux capacitor, 1/4\" thread";


    // Send a broadcast to the HUD.
    Action.sendBroadcast({
        action: "com.six15.hudservice.ACTION_SEND_TEXT",
        flags: ["ReceiverForeground"],
        extras: [
            { name: "text0", value: "Scan Product", type: "string" },
            { name: "bg_color0", value: "RED", type: "string" },
            { name: "weight0", value: "1", type: "string" },

            { name: "text1", value: hud_pn_str, type: "string" },
            { name: "weight1", value: "2", type: "string" },

            { name: "text2", value: hud_desc_str, type: "string" },
            { name: "weight2", value: "1", type: "string" },

        ]
    });
}
sendTextToHud();
WLEvent.on("ScreenUpdated", sendTextToHud);
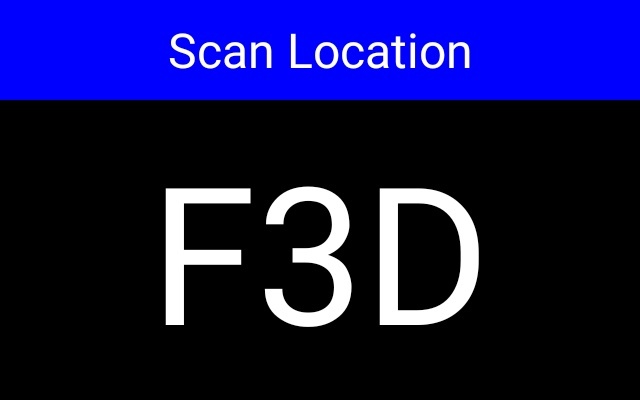
Basic Information (2 Line)
function sendTextToHud(event) {
    // var title_color comes from parameter.
    // var title_text comes from parameter.
    var title_text = "Scan Location";
    var title_color = "BLUE";

    // Read the string value of the id
    // getTextById() often returns strings with trailing spaces. The phone UI removes them automatically, so we do too.
    // var body_text_str = ModernScreen.getTextById(body_text_id);
    // var body_text_str = ModernScreen.getTextById("added_637907301759998116");
    // if (body_text_str == null) {
    //   return; // This stops occasional empty screens from rendering.
    // } else {
    //   body_text_str = body_text_str.trim();
    // }
    var body_text_str = "F3D"

    // Send a broadcast to the HUD.
    Action.sendBroadcast({
        action: "com.six15.hudservice.ACTION_SEND_TEXT",
        flags: ["ReceiverForeground"],
        extras: [
            { name: "text0", value: title_text, type: "string" },
            { name: "bg_color0", value: title_color, type: "string" },
            { name: "weight0", value: "1", type: "string" },

            { name: "text1", value: body_text_str, type: "string" },
            { name: "weight1", value: "3", type: "string" },
        ]
    });
}
sendTextToHud();
WLEvent.on("ScreenUpdated", sendTextToHud);
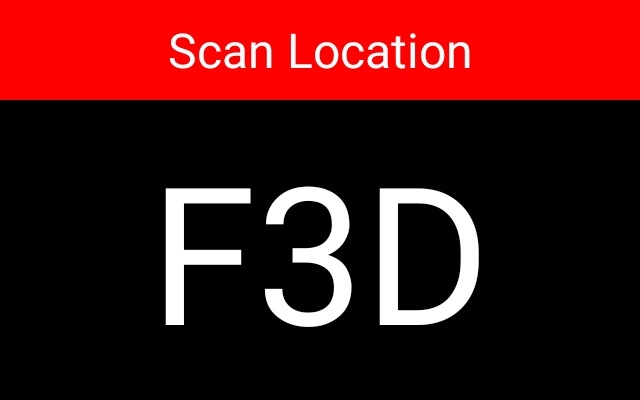
Basic Error (2 Line)
function sendTextToHud(event) {
    // var title_color comes from parameter.
    // var title_text comes from parameter.
    var title_text = "Scan Location";
    var title_color = "RED";

    // Read the string value of the id
    // getTextById() often returns strings with trailing spaces. The phone UI removes them automatically, so we do too.
    // var body_text_str = ModernScreen.getTextById(body_text_id);
    // var body_text_str = ModernScreen.getTextById("added_637907301759998116");
    // if (body_text_str == null) {
    //   return; // This stops occasional empty screens from rendering.
    // } else {
    //   body_text_str = body_text_str.trim();
    // }
    var body_text_str = "F3D"

    // Send a broadcast to the HUD.
    Action.sendBroadcast({
        action: "com.six15.hudservice.ACTION_SEND_TEXT",
        flags: ["ReceiverForeground"],
        extras: [
            { name: "text0", value: title_text, type: "string" },
            { name: "bg_color0", value: title_color, type: "string" },
            { name: "weight0", value: "1", type: "string" },

            { name: "text1", value: body_text_str, type: "string" },
            { name: "weight1", value: "3", type: "string" },
        ]
    });
}
sendTextToHud();
WLEvent.on("ScreenUpdated", sendTextToHud);
Single Line

function sendTextToHud(event) {
    // var body_color comes from parameter.
    // var body_text comes from parameter.
    var body_text = "Pick Complete"
    var body_color = "GREEN"

    // Send a broadcast to the HUD.
    Action.sendBroadcast({
        action: "com.six15.hudservice.ACTION_SEND_TEXT",
        flags: ["ReceiverForeground"],
        extras: [
            { name: "text0", value: body_text, type: "string" },
            { name: "color0", value: body_color, type: "string" },
            { name: "bg_color0", value: "BLACK", type: "string" },
        ]
    });
}
sendTextToHud();
WLEvent.on("ScreenUpdated", sendTextToHud);
Velocity Web
Velocity Web can HUD enable most web-based clients like Manhattan Associates, Infor, SAP, Oracle, or homegrown systems.
Velocity Web doesn’t have a template mechanism or “Component ID” like TE projects do.
This means a Velocity script can’t use ModernScreen.getTextById(...) to read text from the screen.
Instead, code must be injected into the webpage’s JavaScript runtime and executed, and results read back. This can be done with the Velocity Scripting API, specifically
View.insertJavaScript(...) and View.evaluateJavascript(...).
Once injected, code like document.querySelector(...).innerText and document.getElementById(...).innerText can find and read text from the page and construct an Intent Interface screen.
The Velocity script (not the injected script) can then broadcast the Intent Interface screen to the Six15 Service with Action.sendBroadcast(...).
Six15 has created an example Velocity Web project which performs this JavaScript injection, broadcasts Intent Interface data, and displays images on the ST1. You can find it on our GitHub page https://github.com/Six15-Technologies/velocity-web-static-site.
Whenever a page loads, the Velocity script asks the injected JavaScript for an updated Intent Interface screen. This data is then broadcast to the Six15 Service and shown on the ST1. This example project also takes care of starting the Intent Interface and re-injecting JavaScript whenever the page re-loads.
The project on GitHub is configured to parse an example website (https://six15-technologies.github.io/velocity-web-static-site/).
It uses simple (but non-trivial) text extraction to read data from an HTML <table>.
It finds a <tr> (table row) which contains a <th> (table header) which matches some specified string.
From that row it extracts text from a <td> (table data) at a specified column number.
...
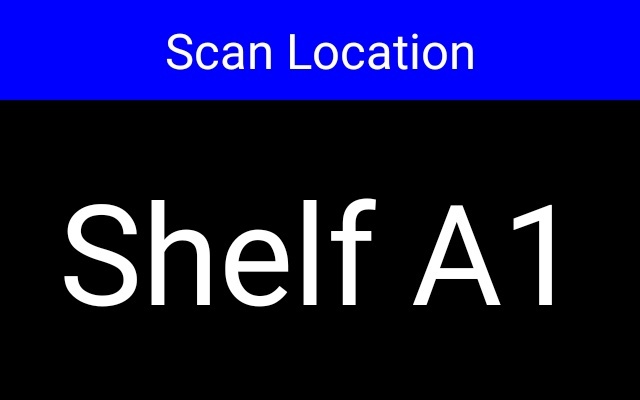
function getLocationScreen() {
var hud_location_str = findTableElementMatching("Location", 0)
return [
{ name: "text0", value: "Scan Location", type: "string" },
{ name: "text1", value: hud_location_str, type: "string" },
{ name: "weight1", value: "3", type: "string" },
{ name: "bg_color0", value: "BLUE", type: "string" },
];
}
function findTableElementMatching(row_header_text, row_data_index) {
return Array.from(document.getElementsByTagName("tr")).filter(
tableRow => tableRow.getElementsByTagName("th")[0].innerText == row_header_text
)[0].getElementsByTagName("td")[row_data_index].innerText
}
This image would be shown on the HUD.
The scripts on our GitHub page are a good starting point for any Web project, but every deployment will need customizations to target different HTML elements. The logic can be modified depending on the scope (essentially URL) of the webpage. It’s fairly easy to customize the injected JavaScript but may require some level of creativity depending on the website.
During development the injected code can be tested outside Velocity using the Chrome Developer Tools.
This makes iterating on the extraction code much faster. For example, the function findTableElementMatching(...){...} could be pasted into the Chrome Debug Console and executed by calling findTableElementMatching("Location", 0).
It would print the expected string 'Shelf A1'.
Chrome can also help automating the process of writing code to extract text.
Under the Developer Tools “Elements” tab, right-clicking on an HTML element allows an option to “Copy -> Copy JS Path”.
This returns a document.querySelector(...) command to access that HTML element.
By simply appending .innerText to the end of this command, text can be read back.
For example, to extract the Location field on the example website (https://six15-technologies.github.io/velocity-web-static-site/), this could be used.
document.querySelector("body > form > table > tbody > tr:nth-child(2) > td").innerText
“Copy JS Path” bases its root at any node with an ID, so they can stay relatively stable on complex pages. For example, to extract the title of this section from this web page, use:
document.querySelector("#velocity-web > h1").innerText
Commands like document.querySelector(...) or document.querySelectorAll(...) can be made more or less complex to fit your needs.
The types of things selectable on are CSS Selectors.
See documentation on querySelector to lean more.